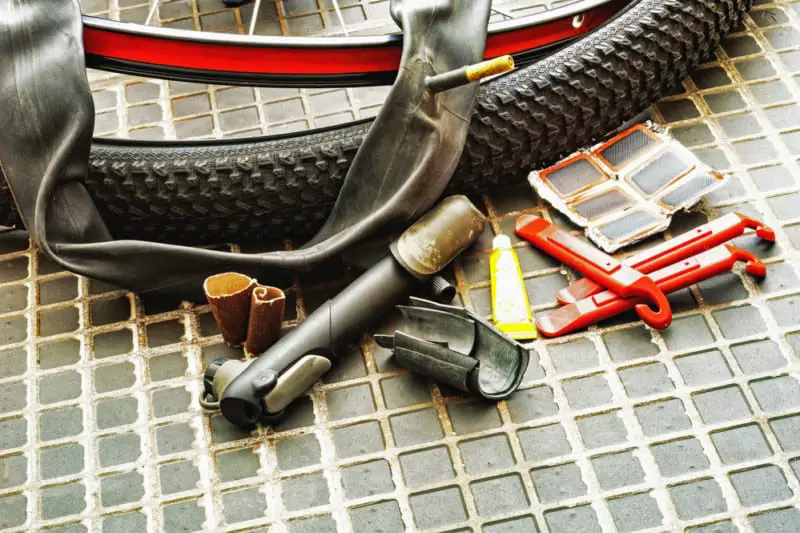
Rim tape is a simple tool with a big job. It’s hard to understand how a thin strip of tape could be so important. But it can play a big role in the functionality of your bike. If rim tape and its functions have you puzzled, it is time to have your questions answered.
1. Do You Need Bike Rim Tape? (Is it Necessary?)
Bicycle rim tape is necessary for preventing flat tires. Rim tape protects a bike’s inner tube from being pierced by the sharp metal edges of the wheel’s spoke holes. So, without rim tape, your bike would quickly get a flat tire, requiring repair.
Spokes are the connecting rods that form your bicycle wheel. And spoke holes are the holes where the rods connect to the wheel’s rim side. These holes don’t look all that threatening, but they can shred your inner tube to pieces if they are not covered.
But not all tires need rim tape. Rim tape is only necessary if your wheels have inner tubes and exposed spoke holes.
a. Do You Need Rim Tape for Tubeless Ready Wheels?
Tubeless-ready wheels have no inner tubes or spoke holes. Which means there is no need for rim tape. The spoke holes on these wheels come permanently sealed. Rim tape would only serve as decoration on these wheels.
Tubeless-ready wheels are sealed air-tight with a special sealant that eliminates the need for tubes. These tires are designed to prevent punctures. They are often installed with a liquid sealant infused inside of the tire. If your tire is punctured while you’re riding the liquid seals the hole before your tire can lose any air. This sealant can last in your tire for up to 6 months.
The only time you will need an inner tube for tubeless wheels, is if your tire suffers a puncture that is too big for the sealant to repair. In this case, it can be repaired by installing an inner tube. But you still won’t need rim tape since the spoke holes are permanently sealed.
b. Do You Need Rim Tape for Clinchers?
Clinchers require rim tape because they have inner tubes. These tires need inner tubes to function. Therefore rim tape is necessary for keeping the inner tube in working condition.
Clinchers are the most common tires used on bikes. They are highly recommended because they are easy to repair, easy to replace, and well priced. Replacing a flat on these tires is a very simple process. All you need to do is remove the inner tube and replace it with a new one. Anyone can do it.
Although this is a very convenient tire to have, it does not perform as well as other tires do.
2. What Happens if You Don’t Use Rim Tape?
If you don’t use rim tape on a tire that requires it, you will get a flat tire. The spoke holes in your tire can shred your inner tube if there is no rim tape to protect it.
This can happen in two ways.
The first is by being punctured by the spokes themselves. When riding without rim tape your inner tube expands into the spoke holes. The tube molds into the spoke holes and becomes vulnerable to the spokes inside.
The second is by being punctured by the edges of the hole. Spoke holes have sharp metal edges, and these can do serious damage to your inner tube.
You may be thinking, why don’t they just make thicker inner tubes?
Well, tubes are thin for a reason. A thinner and more flexible tube helps to reduce rolling resistance. If your inner tube was thicker, your bicycle wouldn’t perform as well.
There are a couple of different types of inner tubes. And the one you choose can affect your riding experience.
Inner tubes are made of either butyl rubber or latex. Butyl rubber is more commonly used than latex. They are thinner with lower rolling resistance. They are also much cheaper than latex tubes. Because butyl tubes are thinner they are more vulnerable to punctures. Which means they require more care.
Latex tubes are known to be more durable and flexible. The flexibility of latex is good because rather than being easily punctured, the latex molds into the shape of whatever is pressing against it. The flexibility of these tires also help to absorb bumps while riding. Which makes for a smoother ride.
Although latex tubes are more durable, they are still no match for spoke holes. You will still need to apply rim tape when using them.
3. When Should You Change Rim Tape?
It is usually best to change your rim tape every time you change your tire. However, it may need to be changed more frequently if the tape is cheaply made, punctured, or applied incorrectly. If your rim tape is damaged in any way, it needs to be replaced.
It all depends on the condition of the tape when you take your tire off.
Tape that isn’t applied well can peel off when removing your tire. If the tape is peeling off or wearing, then it needs to be replaced. You will need to thoroughly inspect your tape to know if it needs to be changed.
Rim tape can also be punctured by spoke holes.
Hitting potholes or riding on rough terrain can cause your tape to be punctured. This doesn’t happen often, but it is still good to check your tape after hitting potholes.
Rim tape can come in nylon, PVC, cloth, or rubber. Cloth is often viewed as one of the best materials, specifically Velox cloth strips. The lifespan of your rim tape depends on the type of tape you are using and whether it is the right type for your wheel.
What material you use depends on your preference but the size of the tape is determined by the width and diameter of your rim. You can find the size of your rim on the back of the rim’s hub. Having the wrong size rim tape can affect the performance of your wheel.
Tape that is too small can slide out of place, resulting in a flat tire. Tape that is too large won’t be able to fit on your rim properly. Always make sure you are buying the right size.
4. Can You Reuse Rim Tape?
Rim tape can be reused until there is visible wear. If you are using a durable high-quality tape, you will be able to reuse it continuously.
Whether you can reuse rim tape depends on the condition of the tape. If the tape is still in great condition and it still sticks, you should be able to use it.
If the tape is worn, ripped, or has been punctured, it cannot be reused. Whether the tape can be reused has a lot to do with the quality of the tape you are using. If it is cheaply made, it will have a shorter life span.
5. What Can You Use Instead of Rim Tape? (Electrical or Duct Tape?)
There is a wide variety of alternatives that can be used in place of bicycle rim tape. Most sturdy tapes can be used as a replacement for rim tape. Your old inner tubes can also work as great alternatives. Inner tubes are flexible and durable which is what makes the perfect rim tape replacement.
If you find yourself in need of rim tape, any of these 6 tapes can make good replacements.
- Hockey tape
- Electrical tape
- Duct tape
- Strapping tape
- Cloth sports tape
- Gorilla Tape
Using a substitute tape or using old inner tubes are both very easy to do. Applying these alternatives requires minimum effort and can be done in less than 10 minutes.
a. Using an Alternative Tape
1. Start by measuring your tape.
You can do this easily by using your used rim tape as a reference. This process will vary depending on the size of your rim and the type of tape you are using.
If you don’t have old tape to use as a reference you can measure the width of your rim using a measuring tape. Don’t have measuring tape either? Just make an estimate. It’s okay if the measurements aren’t exact.
2. Cut the tape
Place your used rim tape against your alternative tape and cut the tape at that width. If your tape is thinner than your rim you don’t have to worry about cutting. Just double the tape so that the entire surface of the rim is covered.
3. Wrap the tape
Wrap the tape around the wheel at least twice. It is important to do this to make sure that the spoke holes do not puncture the tape.
4. Cut a hole
Find the hole for the valve and cut the tape where the whole is covered.
b. Using Old Inner Tubes
This process is almost as easy as using tape.
1.Start by measuring the inner tube.
Use your old rim tape as a reference for how much tube you need to cut. If you don’t have any used rim tape, grab some measuring tape. Measure your rim and apply that measurement to the inner tube. Mark on the inner tube where you will be cutting.
2. Cut the tube.
Cut along the inner tube, creating a long strip of rubber. Make sure the strip you’re cutting is equal to the measurements you took. Be sure to cut the full length of the inner tube.
3. Wrap the strip
Wrap the strip of the inner tube around the rim of your bike. Then cut the strip of tube two inches past where the ends of the tube would meet. So that the tube is overlapping just a bit.
4. Glue
Glue the overlapping tube down with the strongest glue you have at home. Any strong multipurpose adhesive will work great for this.
5. Cut out a hole
Lastly, find the hole for the valve and drill or cut the rubber in that spot.
6. Go for a ride
After that, you’re good to go! Install your tire and go for a ride.
6. Do Bike Wheels Come with Rim Tape?
Most bike wheels come with rim tape already installed. Sadly bikes are not normally sold with a side of extra rim tape. If you want additional rim tape you’ll have to purchase it separately.
Most beginner bikes and older bike models are sold with a rubber rim strip. These rim strips stretch around your wheel like a rubber band. They are not as durable as other materials, but they are very easy to apply.
Current bicycle brands normally have their own specific rim tape that they use on their bikes. If you have a particular rim tape that you prefer, you can always replace the tape that your bike is sold with.
7. Do You Glue Rim Tape?
Most rim tape should come already sticky, so you don’t need to glue it. But in the case that your rim tape isn’t sticking, you can use mild glue to keep it in place.
It’s not often that you will need to do this, but it is a great way to make sure your rim tape stays in place.
If you do choose to glue your rim tape, don’t use too much. A few drops of glue at different points around the rim of the wheel should be more than enough.