A flat tire or tube can completely ruin a ride, so it’s no surprise a bike tire patch kit is a popular component of most riders’ gear bags. But do these products work, or are they relatively useless at doing what they say they do?
Do Bike Tube Patch Kits Work?
Bike tube patch kits do indeed work to seal holes up to a certain size. But some do it much better than others. Self-adhesive patches generally do an ok job, but often only last for a short time. Glue-on patches are a much more permanent fix, and can easily last for the lifespan of the tube.
Patches can be categorized into two main types: self-adhesive or glue-on. Let’s take a closer look at each of these.
Self-Adhesive vs. Glue-On Patches
Self-adhesive patches come with a sticky substance pre-applied. You simply need to find the hole in your tube, clean the area, then press the patch on and you’re good to go!
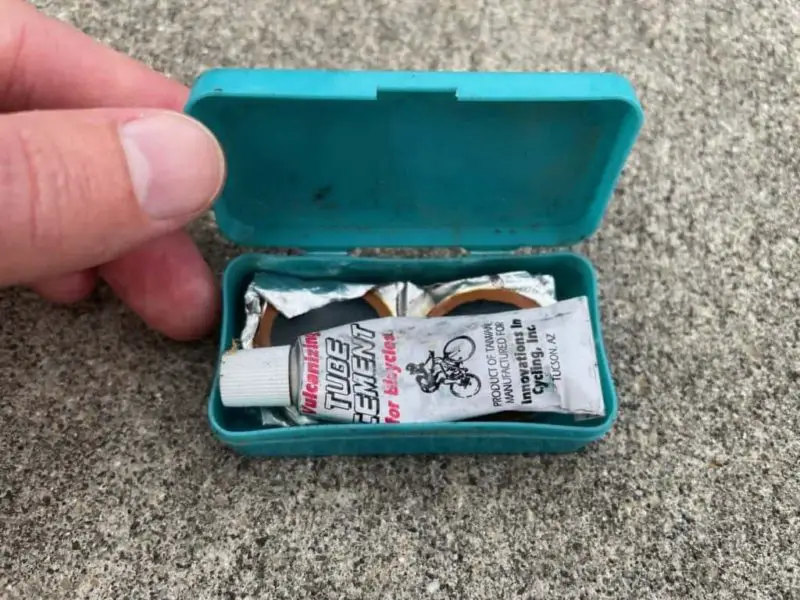
Glue-on patches require that a rubber cement-like compound be applied to the patch first before you use it to cover a hole. The patch must then be allowed to set for a period of time so it may bond fully with the rubber tube.
Do Self Adhesive Bike Patches Work?
Self adhesive patches do work, but not as well as glue-on patches. The quality of the adhesive can vary greatly between brands of patches, making it a guessing game as to when the patch will decide to fall off. It’s also much easier for the air pressure inside the tube to force them off or at the very least create a gap for air to escape.
Glue-on patches are much more effective. While they require the extra step of applying glue to the patch and then allowing it to dry, the improved longevity of the patch makes this completely worth it. The glue used with these patches forms a bond with the rubber tube, basically melding the two materials together. This allows glue-on patches to last significantly longer.
How Long Does It Take for a Tube Patch to Dry?
The benefit of self-adhesive patches is that they’re ready to ride on immediately. Once the patch has been applied, the bond is as strong as it’s going to get…no need to wait for the patch to set.
Glue-on patches, however, require some time for the glue to dry and form a strong bond with the tube. Once applied, they should be left to dry for at least a few minutes, but 5-10 minutes would be preferable. Consult the manufacturer’s instructions to find the recommended set time for the brand you’re using.
How Long Do Patched Bike Tubes Last?
Just because your tube has sustained a puncture, doesn’t mean it’s time to replace it as soon as you get home! A properly repaired tube can last for quite a while, even if it’s been patched a few times.
A self-adhesive patch on a tube may last up to a few months before the adhesive deteriorates and loses its stickiness. It’s a good idea to inspect a tube repaired with a self-adhesive patch every few rides to make sure it’s still in place and not letting air escape.
If you constantly need to reinflate your tire, it may be time to replace the patch or the tube altogether.
A glue-on patch can easily last for the life of the tube. Once the rubber cement has bonded with the tube, it’s become a part of the tube itself and should remain in place permanently.
All that being said, if the patch was improperly applied, you ride on rough trail conditions or you overinflate your tires, your patch will have a much shorter lifespan.
For a more detailed explanation, check out our previous article, How Long Bike Tire Patches Last.
How Many Times Should You Patch a Bike Tube?
The answer to this question really depends on the type of damage your tube is sustaining.
A few small punctures can be repaired without needing to replace the tube altogether.
Any large punctures or tears, or damage occurring in close proximity to the tube’s valve stem, will most likely warrant a replacement.
Needless to say, if a puncture or tear is too large to be covered by the patch you have, it’s time for a new tube (plus using multiple patches to fix one large hole usually isn’t very effective).
And given that bike tubes aren’t that expensive, should you really patch your tube 50 different times just to save a few bucks?
How to Fix a Bike Tube without a Patch
If your bike tube takes a hit and you find yourself without a patch, there are some other options available to you.
Duct tape, which seems to fix just about anything, can also be used to fix some smaller punctures. I recommend cutting a square of duct tape to act as a patch and applying it directly over the hole first. This should allow you to inflate the tube partially so you can then wrap duct tape around the tube and over the hole a few times.
Partially inflating the tube before wrapping it with more duct tape ensures you don’t wrap it too tightly, preventing the tube from being able to inflate fully and evenly.
Rubber cement is another great option for a tube repair MacGyver would be proud of. Paint the rubber cement right over the hole in the tube and allow it to dry. Apply a few layers, allowing each to dry before adding another layer, for a more permanent seal.
Of course, this assumes that you’ve brought either of these items with you on your ride. If not, it looks like you’re walking back home. So for goodness sake go order some patches!
Do Bike Tire Patch Kits Work?
Unless you get a pinch flat (where the tube is squeezed between a hard trail object and your bike’s rim, causing it to rupture), a hole in the tube will probably be accompanied by a hole in the tire.
Or if you use tubeless tires, obviously tire punctures are the only punctures you’re concerned about!
So are TIRE patch kits any good?
Tire patch kits can be very effective at plugging holes to keep you riding. Since tires are not smooth on the outside like tubes, these kits differ from tube patch kits in the components they come with and how they’re applied. It’s a good idea to have both in your gear bag.
Tires can be patched using three different methods: tire plugs, rubber cement, or tire boots.
Tire plugs are strips of sticky rubber (often called “bacon strips”) that are pushed inside a hole in a tubeless tire. The plug gives the tire sealant inside a better chance to form a seal around the hole and prevent air from escaping.
Rubber cement can also be used to repair a tire. Since a tire isn’t smooth on the outside, applying a patch just wouldn’t be effective. Rubber cement can be painted over the hole just as described on a tube in the section above. It can also be painted over a tire plug for an even more robust fix.
A tire boot is the final method for repairing a tire. A boot resembles a larger patch, but is fitted over the hole from the inside, where the tire is smooth. A tire boot is a great choice for larger holes and tears, or if you have a spare tube to install. It covers the hole so the newly installed tube doesn’t bulge out through the opening and expose itself to damage.
Tire and tube punctures are some of the most common issues befalling cyclists. Having a reliable tube and tire patch kit on hand can get you out of some tricky situations and keep you right where you want to be: in the saddle having a great time on your bike!