Ever found yourself halfway up a steep mountain trail, your hands slipping on the worn-out grips of your bike? If you’ve been there, you know how vital it is to understand how to put on bike grips. Imagine the satisfaction when those new grips fit just right and offer perfect control. The sweet sense of accomplishment!

What if I told you that putting on new bar grip isn’t as daunting as it sounds? It’s about getting familiar with different types – slip-on or lock-on – knowing what tools will help in removal and installation process, including an unexpected friend like isopropyl alcohol.
The devil lies in the details: whether installing them onto carbon fiber handlebars or flat bars; avoiding common mistakes so your road racing won’t turn into a balancing act; And wouldn’t video tutorials for visual guidance be nice?
Table Of Contents:
- How to Put on Bike Grips
- Tools and Materials Needed for Grip Installation
- Installing Slip-On Grips
- Installing Lock-On Grips
- Tips for Easy Grip Installation
- Installing Grips on Different Handlebar Types
- Common Mistakes to Avoid When Installing Bike Grips
- Additional Resources and Video Tutorials for Grip Installation
- FAQs in Relation to How to Put on Bike Grips
- Conclusion
How to Put on Bike Grips
Changing your bike grips is like refreshing the steering wheel of your car – it can make a world of difference. But, before you get started, make sure you have everything at hand: new bike handlebar grips, an allen key for lock-on types or some isopropyl alcohol for slip-ons.
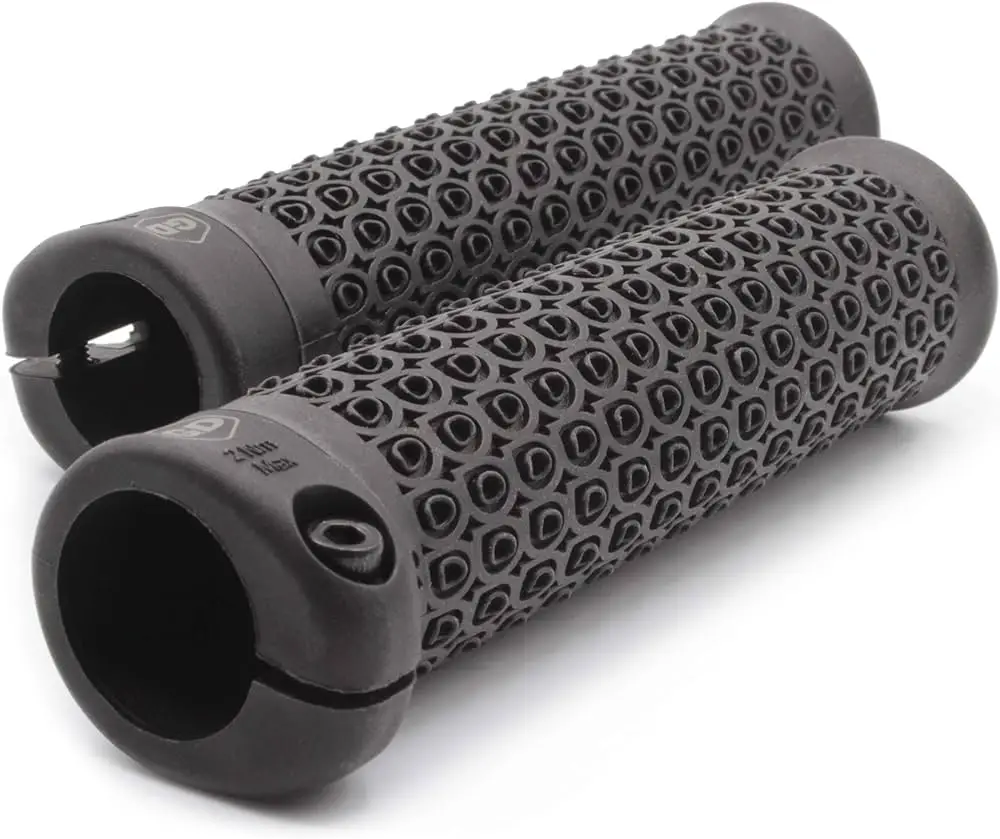
Understanding Grip Types
The two main categories are lock-on and slip-on grips. Lock-on grips use a clamping mechanism that requires an allen key while slip-ons rely on friction alone and can be installed using isopropyl alcohol as lubricant.
Removing Existing Grips
If you’re dealing with worn-out existing ones, grip removal will be the first step in your bike grip installation process. Use a flat head screwdriver to gently pry under the edge without damaging the handlebars or cut along lengthwise if they’re too hard to remove.
In case of lock-ons, just loosen them up with an allen key and slide off from the bars. Remember though; never force things. Patience pays when it comes to removing old equipment from bikes especially mountain bikes which might have more stubborn components due to rough usage.
Grip Installation Process
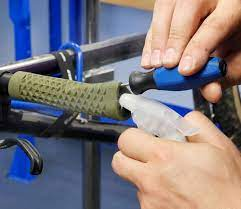
To install handlebar grips whether they’re for road racing or simple fitness biking needs careful attention. For installing new slip-on type bike handles, spray rubbing alcohol inside the grip’s inner surface then simply slide onto bar-end until snugly fit against end stopper called ‘Bar-end plugs’. Once dried out completely (which may take a few hours), these will stay put even during rigorous rides.
If you’re dealing with lock-on grips, position them on handlebars and tighten the allen screws. This process is more straightforward than slip-ons but ensure not to overtighten as it may damage carbon fiber handlebars.
Changing bike grips isn’t rocket science, but doing it right can make your biking experience so much better. So go ahead and give your ride that much-needed upgrade.
Tools and Materials Needed for Grip Installation
Before you get started on replacing your old bike grips, let’s gather all the tools and materials needed. Having everything at hand will make the process smoother and more efficient.
You’ll need a flat head screwdriver or an allen key to help with removing existing grips. These tools are effective in loosening up any stuck-on debris between the grip and handlebar.
For an effective grip removal and installation, rubbing alcohol (Isopropyl Alcohol) is a must-have in your toolbox. It works wonders when it comes to both removal of old grips and installation of new ones.
The Role of Isopropyl Alcohol in Grip Removal and Installation
Rubbing alcohol isn’t just good for cleaning wounds – it has its place in our little biking world too. When applied around the inner lining of a new grip or under an existing one, it acts as a lubricant that allows easy sliding off or on to the handlebars. But don’t worry if you can’t find this handy liquid; household items like hand sanitizer can do the trick since they contain high amounts of isopropyl alcohol.
In some cases where stubbornness prevails (we’re talking about those pesky grips.), using compressed air might be necessary. By inserting a small nozzle underneath them while applying pressure, we can easily ‘pop’ them off without causing any damage.
Lastly but not least important: zip ties. They serve multiple purposes during this operation – from helping slide off tightly fitted old bar grip by acting as shims, to assisting secure placement during install process making sure nothing slips out unexpectedly.
Installing Slip-On Grips
Slip-on grips, as the name suggests, simply slide onto your bike’s handlebars. It sounds straightforward, but there are a few tricks to get them securely in place without any frustration.
The first step is making sure you have everything ready. You’ll need your new slip-on grips and some isopropyl alcohol. This isn’t for sanitizing; it’s actually one of the best-kept secrets in grip installation. If you don’t have any on hand, an alternative can be a spray lubricant or even simple household dish soap.
Clean Your Handlebars
Before we commence the installation procedure, it’s important to make sure that our workspace is spick and span. Remove any residue from old adhesive or dirt from your handlebar using rubbing alcohol or warm soapy water.
Spray Rubbing Alcohol Inside The Grip And On The Handlebar
Spraying rubbing alcohol inside the new grip will help it easily slide onto the bar. But remember: use just enough to wet it; no need for soaking.
Slide On The New Grip
Pick up your grip (opening facing down) and align it with the end of your handlebar. Then push firmly until fully seated on its position – this might require a bit more muscle than expected. Be careful not to twist while pushing though – twisting could cause uneven distribution of friction that makes sliding harder.
Tips For Perfect Installation:
- Avoid installing when temperatures are very cold as this may harden rubber material causing difficulty during install process.
- Don’t rush it. Give the alcohol some time to evaporate fully before taking your bike for a spin. This will make sure your grips stay put.
- If you’re having trouble, try using compressed air to help slide the grip onto the handlebar.
And there you have it – installing slip-on grips doesn’t need to be an intimidating task. With these tips and tricks up your sleeve, you’ll be back on the road (or mountain trail) in no time.
 Installing Lock-On Grips
 Installing Lock-On Grips
Swapping out your old bike grips for a new set of lock-on grips can truly transform your mountain biking experience. These grips are popular among riders because they’re secure, comfortable, and straightforward to install.
Before installing the new lock-on grips, ensure that both ends of the handlebar are clear of any debris or old grip residue by wiping them down with a clean cloth. Use a clean cloth to wipe down each end thoroughly.
The Installation Process
Begin by sliding one grip onto one end of the handlebar until it is flush against its edge. You’ll notice that most lock-on grips come with an Allen key hole on their side – this is where you will tighten them into place using an Allen key.
All you have to do now is insert your Allen key into this hole and turn clockwise until snug – but not too tight. Over-tightening could potentially damage your bars or even lead to issues further down the line when trying to remove these in the future.
Fitting Bar-End Plugs
No grip installation would be complete without fitting bar-end plugs; they offer added protection for both the rider and gear during falls while also providing a polished look.
To fit these handy additions, simply slide them inside each end, then use either a flat head screwdriver or a similar tool to press firmly until they sit securely within the tube’s interior space. Ensure that no sharp edges protrude outside the circumference of the bar itself, thereby reducing the risk of injury. Accidents happen on the trail, which is unfortunately a part of life for a mountain biker. Having experienced the consequences of not taking proper precautions ourselves, we understand the importance of getting things right from the start. Hence, the importance of getting things right from the outset to avoid such mishaps from happening in the beginning, thereby allowing us to focus solely on enjoying the ride ahead, knowing we’ve taken care of our bike to the best of our ability.
So, go ahead and give your ride a fresh feel with new lock-on grips. Remember, the right grip can make all the difference when it comes to control and comfort on those long trail rides.
Tips for Easy Grip Installation
Installing bike grips might seem tricky, but with the right technique and a few pro tips, it can be as smooth as pedaling downhill. So let’s roll.
The Power of Spray Lubricant
Firstly, to make your grip installation easier, consider using a spray lubricant. This will not only ease the process but also ensure that your grips stay put during those intense mountain biking sessions. Just remember: don’t overdo it. Too much lubrication could lead to slippery handles – an unwanted surprise mid ride.
A Handy Tip For Handle Bars
Your handle bars play a vital role in this operation too. Make sure they are clean and free from any residue before you start installing new grips. A swift cleaning with some isopropyl alcohol should take care of any dirt or grime.
How To Use The Grip Spray Effectively?
Spraying directly onto your bar grip or inside the new grip itself makes sliding them on less of a wrestling match. But hold on there cowboy. Be careful not to spray too close or too much; we want even distribution without drowning our equipment.
The Role Of Bar Ends In Bike Grips Installation
If you’re wondering what those little plugs at the end of your handlebars (bar-end plugs) are for – well they aren’t just for aesthetics. They provide safety by preventing injuries caused by open tubes and help keep your shiny new grips in place while you’re tearing up trails on that road bike or flying high off ramps on your mountain bike.
Installing Grips on Different Handlebar Types
The process of installing grips varies slightly depending on the type of handlebars you’re dealing with. Whether they are carbon fiber handlebars or flat bars, there’s a right way to get those grips in place.
Installing Grips on Carbon Fiber Handlebars
If your mountain bike has carbon fiber handlebars, extra care is needed during installation. Carbon fiber is strong but can be damaged by sharp tools or excessive pressure.
To install bar grip, first make sure that the inside of the grip and outside area of the bar are clean. Spray rubbing alcohol inside the grip and onto your carbon bars – it’ll act as a lubricant initially then evaporate, leaving your grips securely in place.
Installing Grips on Flat Bars
For flat bars often found on road bikes and some types of mountain bikes, start by cleaning off any dirt or old adhesive from your previous existing grip removal process. Once done, apply either specialized spray meant for bike grip installations or an easily available alternative like hairspray within new grips.
This will let them simply slide onto bars while wet but once dry they’ll hold firm even when under stress – just what you need during intense road racing.
The key takeaway here is no matter the type of handlebars you’re working with, there’s a method to install those grips effectively and securely. With practice and patience, your grip installation process will become second nature.
Common Mistakes to Avoid When Installing Bike Grips
We’ve all been there – midway through a bike grip installation, only to realize something’s gone awry. Let’s save you some future frustration by highlighting common missteps and how to sidestep them.
Overlooking the Importance of Clean Handlebars
A clean handlebar makes for an easier grip install. But many folks overlook this step, resulting in grips that slip and slide about. So before you start your bike grip installation, make sure your bars are free from dirt or old adhesive residues.
Rushing the Installation Process
The tortoise was onto something when he said slow and steady wins the race. It’s tempting to rush through the process of getting those new grips place but patience pays off here. If you force things too quickly, it could lead to damaging both bar-end plugs and the grips themselves.
Neglecting Proper Alignment
Alignment is more than just aesthetics – it impacts function as well. Misaligned lock-on or slip-on grips can result in uncomfortable rides and even loss of control on tricky terrains like mountain biking trails. So ensure each grip twist matches its counterpart perfectly.
Misusing Isopropyl Alcohol
Isopropyl alcohol (IPA), also known as rubbing alcohol, works wonders during both the removal process of existing grips and installing new ones; however, misuse can cause issues such as premature wear-and-tear or adhesion problems with certain types like carbon fiber handlebars due to its harsh nature against these materials if used excessively. To prevent any damages from IPA, use it sparingly while keeping in mind the material of your handlebars.
Ignoring Wear and Tear
Grips, like all bike components, will eventually wear out. Riding with worn-out grips can lead to discomfort or worse – a loss of control during your ride. Make it a habit to inspect your grips regularly for any signs of damage or excessive wear. The key is preventive maintenance.
Additional Resources and Video Tutorials for Grip Installation
Now that you’ve got a good grasp on the grip installation process, let’s level-up your mountain biking experience with some additional resources. Nothing beats watching an expert in action to solidify your understanding.
You might find this video tutorial, which offers visual guidance on how to install bike grips, quite handy. It not only breaks down each step of the process but also provides practical tips for overcoming common challenges during both slip-on and lock-on grips installs.
Beyond videos, there are numerous online forums where fellow bikers share their experiences and solutions to various issues related to bike grip installation. Websites like MTBR or Mountain Bike Review Forums can be goldmines of information from people who have faced similar situations as yours.
Tips from Pros
If you’re aiming at mastering the art of installing handlebar grips just like pros do it in road racing events or even at local mountain biking races, then taking cues from professional mechanics could be beneficial. A quick search will yield several articles featuring interviews with these experts sharing their tricks of the trade – knowledge that comes straight from years spent tweaking bikes in high-pressure environments.
Dedicated Cycling Blogs
Cycling-focused blogs are another fantastic resource if you want more insights into handling grip installations better. These platforms often offer detailed guides covering every aspect imaginable around cycling – including bike grips. Plus, they often feature comments sections where you can ask questions and get direct feedback from the blog’s author or other readers.
While it might seem like a lot to take in, remember that every cyclist was once at your stage of knowledge – even the pros. Do not be disheartened if you err as you go; contemplate these missteps to be a part of your progression toward becoming an accomplished mountain biker.
FAQs in Relation to How to Put on Bike Grips
How do I keep my bike grips in place?
To hold your bike grips firm, use grip glue or hairspray. Make sure they’re tight and dry before riding.
Are bike grips glued on?
Nope, not always. Some riders prefer using adhesive like grip glue while others choose lock-on or friction-fit types.
How do you position handlebar grips?
The positioning of handlebar grips should align with the angle of your wrists when holding onto the bars comfortably.
How do you put new grips on a mountain bike?
You can slide them on with rubbing alcohol for slip-ons or just bolt them down for lock-ons after removing old ones first.
Conclusion
So, you’ve ventured through the ins and outs of how to put on bike grips. You now understand that grip types matter – slip-on or lock-on each have their unique installation process.
You learned about tools like isopropyl alcohol for a smooth install. You discovered tricks for easy installation and picked up tips on avoiding common mistakes during this process.
Grips aren’t just an accessory but essential gear impacting your mountain biking experience. And they’re not one-size-fits-all either – carbon fiber handlebars demand different care than flat bars.
Now it’s time to take these lessons from screen to road! Get those new grips in place and let the adventures begin!