Ever pedaled your bike only to feel like you’re riding through a pool of molasses? Maybe, as you pumped away furiously on the pedals, it felt like your trusty two-wheeler was taking a leisurely stroll. If so, chances are high that you’ve faced off with an age-old nemesis – a loose bicycle chain.
In the grand scheme of how to tighten bike chain, this is one skill every cyclist should master. Why? Well, because having a well-tensioned chain not only ensures smooth rides but also extends the life of your other valuable components such as sprockets and chain derailleur gears.
With this guide, you’ll be ready to take on any slackened chain issues that come your way. It not only clues you in on signs of too much slack or extra chains but also highlights the tools needed for tension adjustments. Get ready to conquer those problems like a pro!
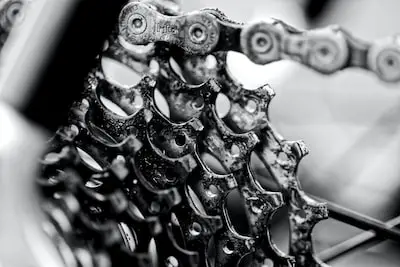
Table Of Contents:
- Understanding the Role and Importance of Bike Chains
- Recognizing Signs of a Loose Bike Chain
- Tools Required for Tightening a Bike Chain
- Detailed Steps for Tightening Your Bike Chain
- Troubleshooting Common Issues with Bike Chains
- Mastering Use of a Master Link for Easier Chain Maintenance
- When Professional Help is Needed for Chain Adjustments
- FAQs in Relation to How to Tighten Bike Chain
- Conclusion
Understanding the Role and Importance of Bike Chains
A bike chain might seem like a small part in your mountain bike’s complex system, but it plays an integral role. Acting as the crucial link between your pedal power and the propulsion of your rear wheel, it’s essential to understand its significance.
The core function of a bike chain is to transfer power. When you push down on those pedals, this energy needs to get to that rear wheel somehow. This happens through the magic – or rather mechanics – of our unsung hero: The bike chain.
If you’re picturing a well-oiled machine here – great. Because oil is indeed involved. Keeping things running smoothly (literally), maintaining proper lubrication reduces friction for more efficient pedaling. However, just slapping on some oil won’t cut it; ensuring correct tension in this vital component is key too.
The Impact of Chain Tension on Bike Performance
You wouldn’t wear loose-fitting shoes for cycling any more than having spaghetti instead of steel for spokes… would you? When our links are slack, we’re not doing ourselves any favors.
In fact, poor tension can negatively impact performance by reducing efficiency while riding up hills or accelerating quickly from stop signs—not ideal situations for cyclists navigating city streets or hitting off-road trails with their mountain bikes.
To put numbers behind words: A typical bicycle drive train has around 1-2% loss in energy due mostly from frictional losses within each rotating part—but this increases significantly if there’s excessive slackness present.
This doesn’t mean pulling that chain as tight as a guitar string either. Like Goldilocks’ porridge, we want it ‘just right.’ Too tight can strain your bike’s drivetrain and wear out components faster. So the key is balance.
Ensuring optimal tension in your bike chain isn’t just good for performance; it also helps prolong the lifespan of this essential component and keep maintenance costs down over time.
Remember, your bike chain is the crucial link transferring pedal power to rear wheel propulsion. It’s not just about keeping it well-oiled but also maintaining proper tension for smooth and efficient riding. Poor tension can reduce performance while over-tightening can strain components. So aim for a balance in chain tension—it boosts performance and prolongs component lifespan.
Recognizing Signs of a Loose Bike Chain
If you’ve noticed any bumps in the road while biking, it could be your bike chain that’s to blame. The signs of a loose bike chain can range from obvious to subtle.
The Effects of Natural Chain Stretch Over Time
Bike chains naturally stretch over time due to continuous use and strain. This stretching leads to excessive slack or extra chain which hangs low on your bicycle, giving off an alarming sign that it’s time for some attention.
A well-tensioned chain should have just enough room to move up and down by about half an inch when pushed with moderate force. If you’re noticing more movement than this, chances are you’ve got a loose bike chain.
While we often associate the term ‘stretch’ with elasticity and assume the original shape will resume once tension is released, in reality our chains don’t possess these superhero capabilities. In fact, each link in the bike chain work together under stress as you pedal along those scenic trails or busy city streets.
This means that over time – especially if regular maintenance has fallen by the wayside – links can wear thin causing them to lengthen (aka “stretch”). A stretched-out or worn-out chain may also cause issues like skipping gears or dropping off entirely during rides – pretty straightforward evidence something isn’t right.
In addition to visual inspection, listening closely can provide hints towards diagnosing a loose bicycle situation before it gets worse; rattling sounds indicate trouble brewing within your drivetrain system because excess play exists between individual parts due to its lackadaisical nature.
To help keep things running smoothly for longer periods without needing major repairs remember: always clean regularly after usage so dirt doesn’t build up causing unnecessary friction which speeds up overall wear & tear on all components involved.
Recognizing these signs early and knowing how to tighten bike chain will not only prolong your chain’s life but also improve the performance of your ride.
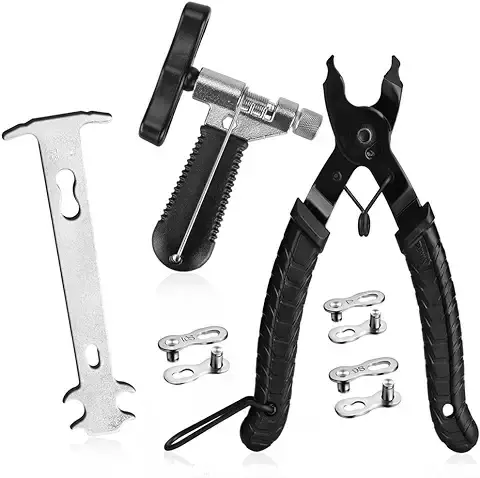
Tools Required for Tightening a Bike Chain
To ensure your bike chain is properly tightened, you’ll need the right tools. Having the correct tools not only makes tightening your bike chain simpler, but also prevents any harm to its components.
The most basic tool you’ll need is an allen key or socket wrench. These are used to loosen and tighten the axle nuts on either side of the rear wheel. When these nuts are loose, you can adjust the position of the wheel in its dropouts – move it back to increase chain tension or forward to decrease it.
Making Use of Supportive Equipment
A supportive piece of equipment such as a bike stand is incredibly useful when adjusting your bike chain’s tightness. By elevating your bicycle off ground level, this allows both wheels freedom to rotate which simplifies tasks like checking how well-tensioned your chain is after adjustments.
If a stand isn’t available, leaning your bike upside against a wall can do just fine too. However be careful with balance so as not let anything fall during maintenance work – wouldn’t want that derailleur step becoming more complicated than necessary.
We recommend wearing gloves while working on tightening chains because they often get oily from lubricants applied for smoother operation. Plus, they protect hands from getting dirty and prevent accidental cuts or scrapes from sharp components within drivetrain system such as gears and sprockets.
Now that we’ve covered all required tools along with some safety measures worth considering before starting this DIY project at home; next time when noticing slack in cycling beast’s lifeline (aka ‘chain’), don’t panic. Just get those tools out, roll up your sleeves and start tightening.
Detailed Steps for Tightening Your Bike Chain
Let’s break down the process of tightening your bike chain into simple, manageable steps. The key is to keep safety front and center while working on this important piece of bicycle maintenance.
Safety Precautions During Chain Tightening
First things first, let’s address safety. Be vigilant, for accidents can transpire if caution is not exercised. Make sure you avoid placing fingers too close to the bike gear during maintenance work. It’s an easy mistake to make if you’re focusing more on fixing a loose chain than keeping your digits safe.
The nuts holding your rear wheel in place are also critical here – they need some attention with a socket wrench. How to Fix A Loose Bicycle Chain offers more detail about these elements.
To get started, loosen both nuts on either side of the rear wheel using your trusty socket wrench; it plays double duty in our operation today. This action allows us some wiggle room (pun intended) for adjusting that pesky loose chain.
Tighten those same loosened nuts back up again while simultaneously holding the wheel back against tension from the now tightened chain. Remember: tension = tightness.
This push-and-pull between maintaining enough slack in the system without letting things get too relaxed helps tighten everything up just right — like tuning a guitar string or adjusting belt buckles till they fit ‘just so’.
Next comes checking: once everything seems snug and secure, take another look at how well-tensioned that formerly-loose bike chain is now.We want Goldilocks-level perfection here— not too tight and definitely not still saggy.
Finally, test out all your hard work by taking a spin. If the chain’s tightness feels right and everything runs smoothly, you’ve done it.
But if things still seem off or don’t quite feel like they’re running at their best, consider seeking professional help for your bike maintenance needs.
Troubleshooting Common Issues with Bike Chains
There’s no need to feel overwhelmed when your bike chain starts acting up. With a bit of effort, you can usually fix any chain-related issues yourself. We’re going to tackle some of the most common problems related to chain tension, like poor shifting and dropping chains.
Making Small Adjustments for Improved Chain Tightness
Even minor alterations can lead to a major difference in the functioning of your bike. To begin, inspect the chain slack on your mountain or single-speed bike by pushing upward on the midpoint of the lower run of chain.
If you find more than half an inch movement either way – that’s too loose. But don’t worry; tightening is easy once you get familiar with your rear derailleur step-by-step process or adjust wheel nuts for bikes without derailleurs.
Finding Tight Spots in Your Chain
Sometimes while adjusting, we may notice tight spots in our chains as they pass through their sprockets – not good at all.
The problem might be due to drivetrain wear or improperly adjusted rear dropouts. This guide can help identify those issues better.
B-Tension Screw: A Hidden Hero?
Apart from regular checks using a reliable chain checker tool, one often overlooked component that could save us from drooping chains is our B-tension screw located near our bike derailleur. Turning this screw clockwise helps increase spring tension leading to improved performance – quite nifty indeed.
Dropping Chains? Not Anymore.
If experiencing frequent dropped chains during rides despite having adequate tension–it might be time for professional intervention since it could indicate worn out components which need replacement. Check with a nearby bike repair store for help.
The ‘Brake’ That Isn’t Really One.
If you’ve got a single-speed or coaster brake setup, then the solution could be simpler than expected. The axle nuts hold your rear wheel in place and adjust chain tension too – pretty neat for something we might have mistaken as part of our brakes.
Remember: You’re never more than just a small step away from achieving greatness.
Mastering Use of a Master Link for Easier Chain Maintenance
If you’re familiar with bike chain maintenance, you might know about the nifty little component called a master link. This tiny piece is more than meets the eye and can make your bike upkeep process much simpler.
The master link, sometimes referred to as quick-link or connecting link, acts like a magic key in the world of chains. It’s specifically designed to connect your bike chain ends together without needing any fancy tools. This lets us skip over complicated traditional methods involving rivets and pins.
Becoming Acquainted with Your New Best Friend: The Master Link
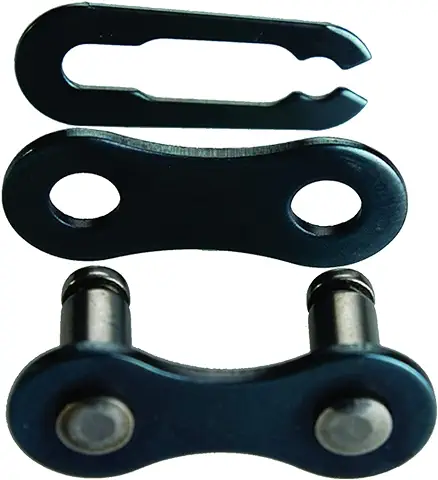 You might be wondering how this mini miracle worker actually functions. A typical master link consists of two interlocking pieces that form an outer plate once connected. These plates hold onto both sides of inner links on your chain, making sure they stay firmly attached during rides but also easy to detach when needed for cleaning or replacement purposes.
The beauty lies in its simplicity. To attach it, all you need is to just push both halves until they click into place; no sweat.
Tips for Smooth Operation Using a Master Link
A few pointers will help ensure optimal use of this handy tool:
- Make sure to align the arrows on each half pointing towards your bike’s direction when assembling them back together after cleaning or replacing parts.
- If things get stubborn and refuse cooperation during removal (which happens rarely), don’t hesitate to employ some pliers specifically designed for such occasions (here are some examples) – remember safety first.
In conclusion, while there’s always room for new techniques in the cycling maintenance world, our good old friend, the master link, remains a reliable and easy solution. It makes bike chain maintenance less of a chore, more like child’s play.
So next time you’re staring at your oily chain wondering how to start the cleanup process without dismantling half of your beloved bicycle – remember this unsung hero. The mighty master link is here to save the day (and quite possibly, also your sanity).
When Professional Help is Needed for Chain Adjustments
Tightening a bike chain can seem like a pretty straightforward task. However, it isn’t always as simple as turning some screws and adjusting the rear dropouts. There are times when seeking professional help from a bike shop becomes necessary.
The complexity of your bike’s drivetrain wear could warrant expert assistance. If you’re pedaling with a set of cogs and shifters, especially on off-road rides or high-powered street cycles, there’s more than just strain to bear in mind. You need to account for derailleur step adjustments involving the b-tension screw and limit screws.
If these terms sound alien to you or if you’ve attempted an adjustment only to have issues persist—like your chain dropping, poor shifting performance, or noise—you might want professional eyes on it. Bike shops have specialized tools such as chain checkers that let them accurately gauge wear and elongation—a worn chain will not hold its tension well regardless of how much tweaking you do at home.
Considerations Before Seeking Professional Assistance
You also might find yourself in over your head if you own single speed models featuring coaster brakes; they require additional considerations during wheel adjust processes due to their brake arm positioning near axle nuts—an aspect novices may overlook leading potentially dangerous outcomes. So remember: safety first.
Your decision should also take into consideration time versus cost efficiency—it’s often faster (and less stressful) letting professionals handle complex tasks while freeing up hours for other activities instead of struggling through intricate DIY fixes.
Bike Shop Expertise Beyond Just Tightening Chains
A trip to the local bike shop doesn’t merely get your loose bicycle sorted out but provides an opportunity for comprehensive maintenance checks too—your visit could uncover other potential issues before they turn into costly problems down the road.
Professional bike technicians will use their years of experience and specialized knowledge to ensure your ride is in top shape, which can include things like aligning derailleurs, checking for drivetrain wear, adjusting brakes, or even just giving some helpful advice on routine bike maintenance. After all—a well-tensioned chain contributes significantly towards a smooth riding experience.
FAQs in Relation to How to Tighten Bike Chain
What is the best way to tighten a bike chain?
The top method for tightening a bike chain involves loosening rear wheel nuts, pulling back the wheel, then retightening while maintaining tension.
How do you tighten chain tension?
Tighten chain tension by adjusting the position of your rear axle. Move it backward in its slots until optimal slack is achieved.
What happens if a bike chain is too loose?
A too-loose bike chain can lead to poor shifting or even derailment during rides. It also speeds up wear on both sprockets and itself.
How do you tighten a bike chain that keeps falling off?
If your bicycle’s chain consistently falls off, repositioning the rear axle and properly setting gear limits should fix this problem efficiently.
Conclusion
Understanding how to tighten bike chain is an essential skill every cyclist should master. It not only boosts your ride’s efficiency but also extends the lifespan of other crucial components.
A loose chain can drastically impact your cycling performance, causing unwanted interruptions and damage. Regularly checking for signs like excessive slack or extra chains will save you from potential trouble down the road.
The right tools make all the difference in this process – a socket wrench, gloves, and supportive equipment like a bike stand come in handy. With these at your disposal, even detailed steps seem less daunting!
Sometimes though, it might be necessary to seek professional help when dealing with complex adjustments. Remember that ensuring optimal performance isn’t about doing it all yourself; it’s about knowing when to ask for help too.