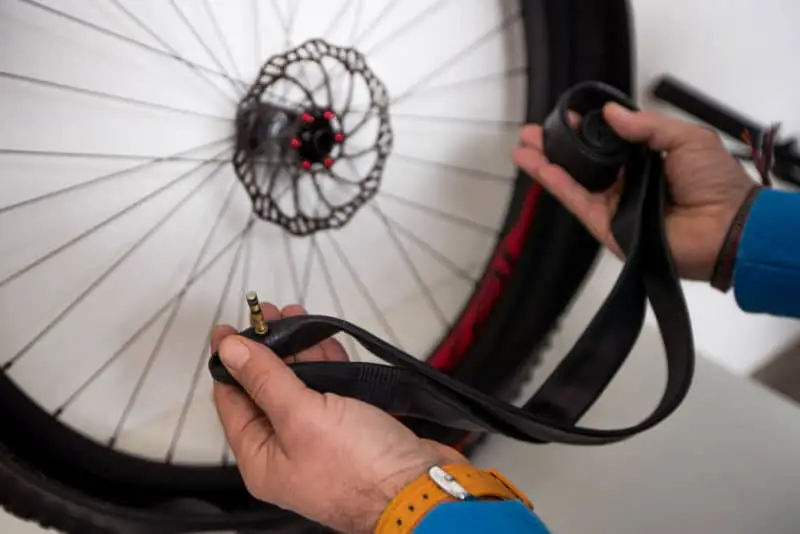
Over the past few decades, many riders have adopted tubeless tires on their bikes, as the benefits of running a tubeless system far outweigh that of tires with tubes. So why then do most riders (myself included) carry a spare tube in their emergency repair kit? Will a tubeless tire even work with a tube in it?
A tubeless tire will function perfectly with a tube. If your tubeless tire sustains a puncture too large for the sealant or a plug to seal properly, installing a tube will help your tire hold air long enough for you to get home without walking.
Everyone should carry a spare tube with them on their rides, but under what circumstances should you use it? And how do you put a tube in a tubeless tire? Read on for the answers!
Tubeless Bike Tires Can Take Tubes
Tubeless bike tires are specifically designed to work without tubes, but they will still work with a tube installed.
However, this does not work in reverse. A tire that isn’t “tubeless ready” will not work without a tube.

A tubeless tire is designed with a squared-off bead: the inside edge of a tire that pushes against the rim’s inside edge. This forms a leak proof seal to hold air. How can you tell if your tire can be run tubeless? Tires from major brands such as Maxxis will say “Tubeless Ready” to make it easy, but you can always consult the manufacturer’s website if you’re unsure.
A non-tubeless ready tire will feature a rounded bead: suitable for keeping the tire and tube on the rim, but it doesn’t provide a flush seal that would keep air from escaping were the tube not present.
Tubeless tires also feature stronger sidewalls to resist punctures and blowouts. Neither the square bead nor stronger sidewall prevent a tube from being used in a tubeless tire should an emergency arise. So when would you want to use one?
When to Use Tubes in a Tubeless Tire
Tube tires have one advantage over tubeless: small punctures that only penetrate the tire and not the tube will not affect your ride. With a tubeless tire, any puncture, no matter how small, will cause air to escape.
To correct this issue, tubeless tires are run with tire sealant: a latex-based liquid compound poured inside the tire. When the sealant flows over a puncture and contacts the outside air, it fills in that gap and begins to thicken to seal the opening, similar to how your blood forms a clot over an injury.
However, sometimes a puncture is too large for the sealant or a tire plug (which you should also be carrying on all your rides!) to fix properly. Your tire’s sidewall may also sustain a cut which neither method will fix.
In these instances, installing a tube will allow you to continue your ride without needing to walk your bike back to the car or home. Punctures have a nasty habit of occurring as far away from where you started your ride as possible, so a spare tube should be an essential part of your riding kit! You never know when you (or a friend) may need it.

In some cases, a tube could also serve as a proactive means of preventing flats.
If you plan on riding in extremely rocky terrain, you may want to consider installing tubes. Sharp rocks are much more likely to cause punctures, and since you should be running higher tire pressures in this terrain anyway, you won’t be missing out on the benefits of tubeless tires as much.
Downsides of Using Tubes in a Tubeless Tire
The biggest downside of using a tube in a tubeless tire is the whole reason people switch to tubeless in the first place. Tubeless tires allow you to run lower air pressure, which improves grip and traction while also making pinch flats a thing of the past.
Running lower air pressure increases the surface area of the tire in contact with the ground. This improves traction. A softer tire is at less risk of bouncing over objects such as rocks or roots, and will instead absorb trail impacts. A tire can only provide grip if it’s actually touching the ground!
If you run tubes in your tires, you won’t be able to run these lower air pressures.
Why? Because of pinch flats.
A pinch flat is when your tube gets caught in between your rim and a hard riding surface. When this occurs, the tube gets compressed (pinched) and can rupture. Remove the tube, and you remove pinch flats from the plethora of issues that could ruin your ride.
Tubeless tires really are better in almost every way, so switching back to a tube setup should only be done in an emergency to get you home…and then once you repair the issue more permanently, get that tube out of there!
How to Install a Tube in a Tubeless Tire
Step 1: Remove Wheel from Bike
Remove the affected wheel by unscrewing the thru axle holding it to the fork or frame. Release as much air from the tire as possible before attempting to remove it from the rim.
Step 2: Remove Tire from Rim
This part takes a little effort. Squeeze the tire in toward the center of the rim to start to unseat the tire’s bead from the rim. Sometimes this can be done by hand, but typically you’ll need to use a tire lever to finish the job.
Once the tire is fully loosened, be careful not to spill the tire sealant. Sure, it isn’t serving any purpose now that we need to install a tube, but dumping sealant out all over the trail or road is bad etiquette!
You could take the tire completely off the rim, but I recommend only loosening one side all the way around just enough to slide the tube in there. This will make it much easier to get the tube into position and cut your work in half when replacing the tire on the rim.
Step 3: Remove Valve from Rim
A tubeless tire requires a tubeless valve to inflate. Now that we’ll be installing a tube that has its own valve attached, we need to remove the existing valve. Do this by unscrewing the threaded nut on the outside of the valve. You can then remove the valve from the inside part of the rim.
Be sure to save the valve and screw! You’ll need to use it again to convert your wheel back to tubeless.
Step 4: Install Tube
If your tire has sustained a large puncture or tear, you’ll need to boot it before inserting the tube. Booting a tire simply means blocking the large puncture from the inside to prevent the tube from bulging out through the opening once it’s inflated. You can use a designated tire boot if you have one, or even an energy bar wrapper in a pinch.
When installing the tube, start by inserting the valve through the opening in the rim, making sure the tube lies flat. It helps to partially inflate the tube before installing: this ensures it won’t get twisted.
Step 5: Replace Tire on Rim
You can get most of the tire back inside the rim by hand, but a tire lever will help with the last few inches.
Step 6: Inflate Tube
Now that the tire is back on the rim, you can fully inflate the tube. You’ll generally need to inflate the tire to a pressure greater than 30psi to get the tire to seat properly (you’ll hear a telltale series of pops when this occurs); then you can reduce it to your desired pressure reading.
But remember, a tube tire setup will require slightly higher air pressure than you were running with a tubeless tire. This could be as high as 5-8psi more…which may not sound like a lot, but it makes a huge difference in how your tire will feel and perform.
Step 7: Replace Wheel on Bike
Once you’ve determined your tire is holding air, you can replace it on your bike. This is a fairly permanent fix, and you’ll be good to ride this tire until another large puncture occurs, but I would recommend removing the tire and repairing it with a proper boot when you get home. That way you can go back to a tubeless setup.
Save that tube though: you never know when another issue may arise!
If you’re a visual learner, check out this video from Park Tool, which will show you how to replace a tube in a mountain or road bike tire:
And for more information on how to boot a tire or use a tire plug to fix smaller punctures and hopefully avoid needing to install a tube in the first place, see the video below:
Tubes Aren’t Obsolete!
Tubeless tires offer significant benefits over tires with tubes. But tubes are by no means obsolete: they may very well be the difference between riding your bike 10 miles back to your car, or walking.
So buy a spare tube (or two) and keep it in your riding kit every time you take your bike on an adventure: whether it’s an epic backcountry excursion or just around town.
